ESLife

Posts in the how-to category

Introduction to Lock Picking

By Isabella Woods

Don't worry, this isn't the beginning of a slippery slope into a life of crime! There are many reasons why perfectly law-abiding citizens should familiarize themselves with the basics of picking locks. Most people carry around a bunch of keys that will open the doors to all parts of their lives including their home, office, car, bicycle padlock, gym lockers and garages. If these keys ever go missing it can be a real disaster. Having the ability to pick open your locks in an emergency saves time, expense and worry.

However, it is important to be aware of the ethics of picking locks. Locks are there for a reason, and it is both completely illegal and unethical to open a lock without the express permission of the property owner or legitimate keyholder. While lock picking is associated in a lot of people's minds with criminal behavior, the truth is that few criminals bother going to the trouble of learning how to pick locks other than those on cars, preferring instead to break their way through doors and windows.

In reality, most people who pick locks are professional locksmiths called upon by the keyholders of the lock in question. Whereas a criminal will smash a door down to get inside a building, most honest people prefer to hire a locksmith to open the lock without causing damage to the property. Professional locksmiths have a lot of different bits of equipment designed to help get them through doors, including electric pick guns which vibrate inside the lock to jiggle it open. Yet any true professional should be able to get through a basic pin-and-tumbler lock with nothing more than a small flat head screwdriver and a bent paper clip.

There is also a third kind of lock picker: the hobbyist, who likes the challenge and the puzzle element of picking a lock. Getting through a lock without a key is a satisfying skill to master, as it relies on the senses as well as intelligence and patience. Lock pickers must learn to listen to the tiny noises from within the lock that tell them when the pins are in place; they must be dextrous enough to make the subtle movements needed, and to feel the slightest movement within the lock through the tips of their fingers. It is also important to have a talent for visualizing the insides of a lock, and an understanding of the way different locks work. All of these elements combine to make lock picking a fun past time for a lot of people. There are two good reasons why it is good to learn a little about picking a lock: firstly for practical independence, in order that you can never get locked out of your own house, and secondly because it is great fun to try.

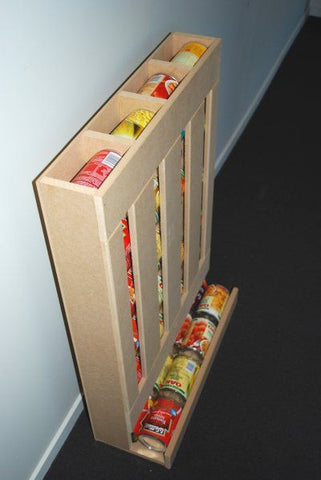
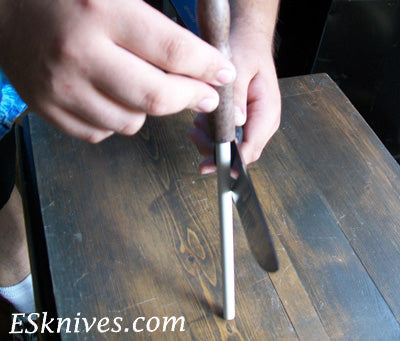
A basic pin-and-tumbler lock can be opened with relative ease and a essential lock picking kit. These are the kinds of locks often found inside padlocks, on house doors, so it is useful to know how to get around them. A pin-and-tumbler lock is like a cork in a bottle. The cork, or tumbler, has holes running into it, and each hole has two pins inside which are cut differently and which run between the tumbler and the surrounding housing (i.e. between the cork and the bottle). When the right key is inserted into the lock the pins lift up so that the gap between the two pins aligns with the edge of the tumbler: this is known as the shear line. This means that the tumbler can be rotated freely, opening the lock. The goal of picking the lock is to lift these pins in the exact same way a key would. To do this, the lock picker inserts a tension wrench to twist the tumbler slightly. The tension wrench is a small flat-headed tool, like a screwdriver. They then prod at the pins inside the lock with a pick – a long piece of thin metal that is hooked slightly at the end – in order to lift them up to the shear line. This takes practice and patience to achieve, but it is a useful skill to have.

Almost everyone who owns a car has had the heart-sinking experience of slamming the door shut only to realize that they've left the keys inside. This momentary lack of concentration is often made worse by the embarrassment and expense of having to explain to a mechanic exactly why they need to break into the car. But before you start looking into scrap insurance prices, if you find that you are frequently locking yourself out of your car it might be wise to learn how to use a slim jim. But it is easy for inexperienced lock pickers to damage the lock or the car door whilst using a slim jim, so it is important to learn this skill with the supervision of an experienced locksmith.

Like a great many other things, lock picking is a skill that can be used both for good and evil purposes. But it is a valuable and useful thing to learn for everyone who can be a little absent minded at times, or even just for those looking for a new way to challenge themselves.
Posted by ES Team on 20 December, 2014 hobbies, how-to | 0 comments | Read more →

Gifting A Knife (tip)

Where I come from it is considered unlucky to give a knife as a gift to a friend because it will cut or sever the relationship. To avoid this curse, the receiver should give a coin in return so as to "pay" for the gift. It is common gesture to include a penny with the knife that is given as a gift which the receiver returns to the giver as "payment".
Gifting a Knife Tip
Posted by ES Team on 16 December, 2014 history, how-to | 0 comments | Read more →

Super Knife Eraser (tip)

Super Knife Eraser
Have you ever wondered why knife dealers knives always look so good?

I sell a lot of knives. I sell high end knives and I sell low end knives. I trade knives. I come across blades that have marks, like rust, tarnish and other markings. You never know, blades do rust and get marked up. I use a Super Knife eraser to clean my blades. There are all sorts of polishes, goops and products that make claims to remove rust and tarnish. I have used them. I have not found one that does the job I need it to do. But my Super Knife eraser is another story. It never lets me down.

The Super Knife Eraser is the well kept secret. They are ideal for erasing rust, tarnish and other surface blemishes on metal, and produces a fine, brushed satin finish. I use my eraser almost daily. I could not live without it.

Every knife collector should know about the Super Eraser. The Super Eraser has an abrasive compound mixed into the rubber of the eraser. I came across some old pocket knives a few weeks ago that had some serious rust spots. I used the Super Rust Eraser and every single knife showed marked improvement. They were not perfect but they came out nice and ready to sell. I sold them as used. That was important, my eraser turned a virtually worthless blade into something not only salvageable but also marketable. Liquid metal cleaners wouldn't touch the spots , but the super Eraser got them off. Honestly, You have to see it to believe it!

The Eraser measures 3-1/8" x 1" x 5/8". They are easy to use, with little effort and they last for years. They are made in Germany. Germans know their knives. It is nice to find a product that is not made in china.
Other Uses for The Super Knife Eraser 1) Great for cleaning the crud out of Tang Stamps on old blades. 2) Removes Oxidation from Derlin handles. 3) Cleans Ceramic and steel sharpening sticks

This may sound like a sales pitch and maybe it is. They are a great seller on the ESKnives site. But really I wanted to spread the joy. I wanted to be helpful and share a tip to knife care that very few know about. There are many people that have tarnished blades and don't have a clue how to restore them. The Super knife Eraser is a good place to start.
Posted by ES Team on 15 December, 2014 how-to | 0 comments | Read more →

Tips on Self Defense with Stun Guns

Self Defense Stun Gun

Self defense is an issue for each and every one of us. We want to have the freedom to go where we want and when we want. We want to feel safe. Second Amendment rights are a hot topic issue in our country. Statistics tell us that most women who carry a handgun are killed with their own handgun when attacked. Not everyone wants or needs to carry a firearm. Most of us want to protect ourselves and our families but many people would have a hard time using a handgun but we still want to feel safe and protect ourselves if needed.

We have many self defense items from blades, batons, kubatons, knuckle belt buckles and stun guns. Stun Guns for defense have become very popular in the last few years. They have become the self defense weapon of choice for many women. On the plus side you will rarely get charged with a crime using a stun gun.

The only self defense tool that sells better than stun guns is pepper gas. I think the fact that this may be because pepper gas tends to be less expensive than a stun gun. But don't be fooled. Stun guns are very effective self defense tools.

Stun guns are small and easily concealed. And are less intimidating by openly carrying a weapon. Stun Guns are easy to use. They require no special training. All you need to do is turn the safety off and press the trigger switch which then shoots a jolt of high voltage electricity to the attacker.

Stun guns are safe. Much safer than firearms. Stun guns are much more humane than firearms. Stun guns come with high voltage and low wattage. It is high wattage that kills people. The high voltage of a stun gun incapacitate your assailant without killing or permanent harm. There are no long lasting effects. After a few minutes they attacker will return to normal.

You can't hurt yourself using a stun gun. There are built in safeties to prevent shocking yourself when using a stun gun on your attacker.

Volts and Watts. The more volts the more powerful the stun gun. Volts are scaled to price. Starting at 100,000 volts. A 100,000 volts gun will incapacitate most people. A gun with 4 million volts will stop the worst of attackers dead in their tracks.

There are several types of stun guns. There are the standard hand devices. These are usually rectangular in shape and fit in your hand. You can carry these devices easily in your hand without intimidating others. Stun Batons are usually circular and longer giving you a longer reach but they are much harder to conceal. Many stung guns come also with flashlights. Then there are look alike stung guns. These are stung guns that look like other devices, like a cell phone, lipstick or a cane but are actually stun guns. These types are the easiest to conceal.

Most stun guns fit easily in your purse or pocket. Most stun guns come with a pouch that will have a loop or clip and can be carried on your side.

If you are attacked the best defense places to use your stun gun on are the neck, shoulders, abdomen, or groin. A half second to one second application causes pain. One or two seconds of the stun gun causes muscle spasms and confusion. Three to five second blasts causes the loss of balance and muscle control, disorientation and confusion. You can not get shocked by the stun gun even if your assailant is touching you. The gun will go easily through 1/2" of clothing.

Stun guns are easy to take care of. Keep them clean with a cloth. Most people like to turn on their stun guns and press the trigger to hear them make a loud electrical popping sound. This is a no no. Don't randomly pop the stun gun. They sound cool and to may impress you friend but ultimately this causes damage to your stun gun. Stun Guns were meant to complete a circuit when used on an attacker. Randomly popping your stun gun will eventually break the gun beyond repair.

Posted by ES Team on 10 December, 2014 how-to, self defense | 0 comments | Read more →

How to Sharpen a Knife

Most people stray away from sharpening a knife because they believe that it is a difficult task. They are probably right. Sharpening a knife is not an easy task. Stainless steel is a hard steel. People like it because stainless is rust resistant. Carbon steel is not as hard but holds an edge longer than stainless and performs better than stainless.

Before I start, there are dozens of different ways to sharpen a knife. Everyone has a way they think is best, and have all sorts of techniques and tools that they feel are essential in getting a sharp blade. In the end, much of it comes down to personal preference. In this article I present a couple easy, practical ways. With practice you to will develop your own style.

You want to keep your knives sharp. Two things. If a knife looses it's edge you have a much bigger job than just sharpening your knife. The second thing a dull blade proves to be more dangerous than a sharp blade. The chances of accidents are much greater with a dull blades. The message: Keep your blades sharp.

When you get started you will want a rough stock sharpener , the best is diamond, and a finishing sharpener like a Arkansas stone or a ceramic abrasive. These materials are harder than the steel and will cut away the steel on the surface of the blade easily.

When using your knife to cut if it turns to the right or to the left you know that it is time sharpen.

how to sharpen knife ceramic sharpener

Ceramic and stone/oil

If you are using a steel or ceramic place your knife blade against the tip at a 20 degree angle. Pull the knife down and across the steel with a slight arc. Take the other side of the blade and repeat this action on the back of the steel . Repeat 10 times or until the blades sharpness is sharp.

The important things to remember is keep your 20 degree angle and run the full length of the steel with the full length of the knife. You will see guys do this very quickly. That comes with practice. Speed movement plays no part at all. Slow or fast, you get the same results. With a little practice you will get the hang of it. Don't give up. You will get it.


how to sharpen knife blade angle

Blade angle

If the steel does not work you will need to re-align the blade. The edge has dulled from constant using. Now you will need a stone. When using a stone, get a fine medium and coarse stone. You can find stones that have all three grades. A little honing oil will help. If you don't have honing oil a 3 in 1 type oil works in a pinch.

The angle you use on a stones determines that sharpness of the edge. The smaller the angle means the sharper the edge. The shaper the edge the faster a blade needs to be re-sharpened.

Place a little oil on your stone. Pick you angle. Here is the hard part: keeping the angle for 30 to 40 strokes before the new edge is formed. Do this with both sides of your blade. Start with your coarse stone and end with your fine stone. With a little practice you will be pleased with your edge. Don't stroke towards your self, Stroke away and you will never get cut.

If you find this procedure to difficult you may want to try sharpening with a knife sharpening system like a Lansky system. A good knife sharpening system comes with several stones and steels to sharpen. There will be some type of clamping system that will hold the knife at the same angle at all times. This makes sharpening your knife fool proof. Of course the systems are much more expensive than a steel or a stone but they give you a perfect edge.

Lansky

You can learn to sharpen serrations with a steel. My experience has been a chainsaw sharpener works best. A proper angle for a serrated blade is 20 to 25 degrees.

Posted by ES Team on 09 December, 2014 how-to | 0 comments | Read more →

Getting the Tents Ready

Labor Day Weekend is the time. This is the time my Son and I have planned our next backpacking adventure. We are going to the mountains!

The key to a successful backpacking trip is proper planning and good equipment. Today we went through our equipment, decided what we have and what we need. Today we started our lists.

Shelter is a high priority when you are out in the wilderness. We are ultra light backpackers and we attempt to shave off ounces whenever possible. I have been able to get my winter pack, with 5 days of food, down to around 38 pounds. Light weight yet effective shelter is a must. Our goal is less than 2-1/2 pounds. My Son has a bivy tent and I take a kelty tarp. His tent is off market, but a nice tent none the less. With poles and stakes it weighs around 2-1/2lbs. My Kelty tarp is the large tarp. I like the large tarp because it can be used as a gathering place and is nice to sleep under. In a major storm I can roll up in it with my sleeping bag and stay warm and dry. My Kelty Tarp weighs in at around 2 pounds with stakes. I use my walking stick as a pole.

Backpacking Tent  Backpacking Kelty Tarp

Backpacking Bivy tent

 We have not been backpacking in a couple years so today we decided to prepare the tents for our trip. Preparing a tent for a trip means seam sealing and waterproofing.

There are many ways and many products to complete the waterproofing process. I am going to share how I waterproof a shelter.

We set up our shelters to make sure that we had all the parts. Once the tent is set up it is time to silicone. Spray silicone or spray waterproofing, is inexpensive and works well. When spraying silicone on your shelter you spray it like you were spraying spray paint trying to get a good coat but not to thick. Be sure to focus on the seams. During a warm afternoon it takes around about to dry fully. Your tent is now waterproofed.  

 Waterproofing Tent     Waterproofing Kelty Tarp

Waterproofing is not enough. If you are going to have a leak on the trail it will probably be through a seam. Seam sealing is the next step. There are lots of seam sealers out there. Some are rather pricey. I use an inexpensive sealer that can be bought in any camping section at K-Mart, Wallmart or Target. I have had good luck with the lower end seam seal.

Turn your tent inside out and apply the sealer per directions. It is not hard to do. A hard flat surface is necessary to apply the sealer to the seam. The key to seam sealing is being slow and steady. Take your time and get the sealer into all the seams. Let your tent dry over night and put in it's sack.


Seam sealing a tent     Seam sealing tent for backpacking

Your shelter is now ready to go. This process should last one or two seasons with no leak problems.

I will continue to make updates on the upcoming backpacking trip.

Posted by ES Team on 08 December, 2014 camping, ES family, hobbies, how-to | 1 comment | Read more →

Country Ribs Italiano Recipe

Easy Country Ribs Italiano Recipe

Country ribs are an odd cut of meat. First of all they are not ribs. I believe the cut is called a rib as a selling point. They are cut from the sirloin or the rib end of the pork loin. Think about it… Who wants to buy cut up loin. Country ribs sounds much nicer and tastier.

Old Meat Men call these ribs, Jack Ribs. They come in in a few different cuts. I prefer the western cut because it includes a little bone. I like the bone. I think it adds flavor to the final product.

I usually cook Jack ribs on the grill that includes an aluminum pan, my favorite barbeque sauce and some good smoke flavoring. Today I was working at home and busy. So I thought I would get the crockpot out and make what I like to call Country Ribs Italiano. This recipe is easy and tasty.

The basic recipe is as follows

  • 1 Package of pork ribs around 3 to 4lbs
  • 2 cans of 14-1/2 oz cans of Italian diced tomatoes
  • 1 cup of frozen pearl onions
  • 1-1/2 tsp Italian Seasoning.
  • A little salt to taste 


Brown your ribs and put in the crockpot. Mix the rest of the ingredients and pour on top. Cook in the crockpot 8 to 10 hours.

This was the recipe I was taught. Now here is how I cooked it and put it together.

The picture above has everything I used except I added some chopped garlic (a couple cloves). I had some diced tomatoes with green chilies so I substituted them for the Italian tomatoes. I try to use what I have in the cabinet. As you can see in the picture I used ribs that were on sale. I look for bargains.

Here are the country ribs browning in the black iron skillet. You can't beat cast iron.

After the ribs have browned I put them in the crockpot. I mixed the rest of the ingredients together including the garlic . Then I poured it on top of the ribs.

What it looked like Before Cooking.

Finished product. Falling of the bone goodness.

I cooked it on low for around 9 hours.I served these ribs with mashed potatoes and green beans

Posted by ES Team on 07 December, 2014 how-to, recipes | 0 comments | Read more →

Knife Tip - storage

Do not store knives in their sheaths. The leather collects moisture and creates pits on the blade. Keep your blades well oiled and you will pass your blades down from generation to generation.
Posted by ES Team on 25 November, 2014 how-to | 0 comments | Read more →

Zombified - The Ultimate Plan

Prepare for the Zombies

You know you need a plan, you just haven't gotten around to it.  The time is now, my friends, the time is now. Zombies don't care if you're ready. They will TAKE YOU OUT.

There are many plans available out there, but having the weapons to defend yourself and loved ones is first and foremost!  Luckily Extremely-sharp.com has all you need for surviving the Zombie Apocalypse.

Just remember, while a sword or shotgun are cool weapons, the most effective defense against walkers is lightly jogging. Stay fit folks.

----------------------------------------------------------------------------------------------

Ask me about my zombie plan

Do you have a plan?

The impending zombie apocalypse is nothing to joke around about. Ladies, do not date a man that can not show you his plan for the zombie apocalypse. If he doesn't know how to protect you, keep looking.

 
----------------------------------------------------------------------------------------------

A few suggested plans, put into a nice infographic so you don't have to read too much:

Zombie Emergency Procedure Inforgraphic

as well as this nice plan: Zombie Survival Guide 

Your Zombie preparation kit has some basic essentials: Survival knife, Stormproof matches, first aid, flashlight, hydration, energy food, signal mirror, cast-iron skillet,. If there is a better place to get a survival knife than www.extremely-sharp.com, we haven't found it. A family owned business with every knife you could possibly want or need.  Every home needs a Zombie Apocalypse Survival Kit!

--------------------------------------------------------------------------------------------

Prevent Zombie infections by washing your hands

Prevent Zombie infection- Wash your hands!

In case of Zombie break glass

Every home needs an "In Case of Zombies Break Glass"  kit like this.

----------------------------------------------------------------------------------------------

Keep Calm zombies

Stay Calm and don't get infected.  Panic makes you not think straight that is far to close to being a zombie for my comfort level.

A good blowgun will get them from far away.

It's nice that Zombies love you for what is on the inside.

--------------------------------------------------------------------------------------------

If you need directions on killing a zombie- here is a simple step by step process:

1. Get Sword from ESknives.com

2. Aim for Neck on Zombie.

How to kill a zombie

Zombie bed sheet set

Turn our Awesome SURVIVAL KIT into a great Christmas or Birthday gift.

--------------------------------------------------------------------------------------------

Scarecrow zombie wants brains

Don't be SCARED. With some protection close by, they will not be eating you.

Deep thought: if a Zombie Apocalypse happened in Vegas, would it stay in Vegas?

--------------------------------------------------------------------------------------------

Count how many zombies you see in this picture. The longer you stare, the more zombies appear!


Magic Eye the more you state the more zombies appear


What are the essentials you will need to fight off a Zombie and defend yourself?  You can get the knives you'll need at ESknives.com. Our family owned business has every knife you need, and we have great guides to tell you how to care for your knives

--------------------------------------------------------------------------------------------

I love zombies movies
Zombie movies are good for helping you prepare for what may be coming.

Also, the CDC (Centers for Disease Control) has some great tips on Zombie preparedness for you to check out.

-------------------------------------------------------------------------------------------

snoopy and the peanuts gang zombies

Once your are infected, there is no going back. Snoopy has to protect himself and you may too.

A nice sword, some knives, and a few blowguns to get started...

--------------------------------------------------------------------------------------------

Zombies eat brains. You are safe

zombie uncle sam poster


Since Zombies really only eat brains, I think You're Safe.

--------------------------------------------------------------------------------------------

Daryl Walking Dead Redneck

Zombie Apocalypse Preparation

Oh yeah- Make fun of the Redneck... until the Zombies come and now you NEED us.

Best protection against Walkers is lightly jogging. Stay Fit.

Then use your fitness tools to protect the house.

Genius.

Want some reading material to build your defense plan?  Follow this link to the Zombie Survival guide to purchase on Amazon.

--------------------------------------------------------------------------------------------

While ESknives.com does recommend having a plan for zombie survival, we also think a little time on a life plan is also advisable.

Lay College Senior Zombie Prep

Zombie warning sign

Posted by ES Team on 22 November, 2014 hobbies, how-to, humor, survival | 0 comments | Read more →

The importance of survival preparation

Incoming Survival Baby
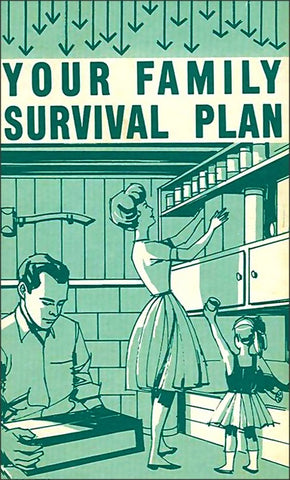
When crap goes down, how will you care for yourself or your family?  You'll need stores of food for a while and you'll most certainly need weapons to protect yourselves.  Some basic tools like an axe, wire saw, machete, duct tape, fillet knives, fire starter, multi use tools... etc are going to be things you can't live without.

Don't be caught unprepared. Have some basic knowledge of preparation and have the tools you will need.

Have enough food in your home to get your family through a few weeks. Can goods, noodles, bullion cubes, foil, powdered milk, sugar, instant coffee, fruit drink mix, powdered eggs, dry beans, lentils, rice, baking powder, etc. There are many websites on this- if you know a good one, leave it in the comments below!

Survival Prep Rotating Can Foods  Survival Preparation Can Rotation

_________________________________________________ _________________________________________________

Duct tape has endless numbers of uses.  You should have a good supply of it - just in case. Here are just a few of the areas that it could be used in emergencies:

Survival Duct Tape Arrow

Duct Tape Survival Emergency Stretcher

This emergency stretcher is just this: for use in an emergency. Always use caution in transporting an injured person.

Duct Tape to Fix Wounds Survival Tip

Using Duct tape to care for a wound: After bleeding stops and the cut is cleaned, trim ¼- to ½-inch-wide strips of duct tape long enough so they will extend at least 1 inch beyond each side of the gash.

Starting in the middle of the wound, apply strips of tape in pairs: First, attach the end of each strip to opposite sides of the cut. Then, gently pull the strips to close the wound, and adhere the loose ends to the cut’s far side. (Fig B). Continue placing pairs of tape strips above and below the center closure (allowing 1/8 inch between strips of tape) until the wound is fully closed. Dress the cut to keep dirt out, and check it regularly for signs of infection.

_________________________________________________ _________________________________________________

Hunting is more than just knowing how to take down a few squirrels or deer. You'll need to skin them and know how to cut them up.

While you're out in the woods hunting, we recommend you carry a few things with you: A Machete, the canvas bag and essentials (see below)

Fillet knife venison cut chart Deer

_______________________________________________________________

Take some time and study how you can live without electricity.

Survival Prep starting a fire.

Knowing how to start a fire is no easy task.  It takes know how - it takes practice.  We highly suggest grabbing one of our fire starters to have close by in your survival prep kit. There are several options for fire starters in our Survival area.

Cook an egg in an orange survival preparation

Simple ideas for cooking over a fire are good to know. For example using an orange to cook an egg is a clever idea we have seen.

_________________________________________________ _________________________________________________

family survival plan

green house underground survival preparation

Survival gear keep safe on hike  Survival prep canvas 3 day pack

Knowing how to stay protected and keep warm on on long hikes - in search of food, firewood, shelter, etc. will be an important thing to learn as you start on survival preparedness. The importance of survival kits can not be stressed enough. You'll want a good canvas bag that you can keep things in: Axe, Wire saw, quart of water, food (jerky, nuts, power bars, MRE's), fire starter, bandana, flash light, multi tool knife, hat, sunscreen, bug spray, water purification tablets, can opener, gloves, etc.

_________________________________________________ _________________________________________________

Wire Saw Survival

Axes, map of town, saw, survival books,

Other things to have: Tarps, plastic sheeting, glow sticks, flash lights, batteries, sew kits, First aid, floss, caste Iron cookware.


Posted by ES Team on 19 November, 2014 how-to, survival | 0 comments | Read more →

Stay in touch

Contact Us

We'd love to hear from you. Call us at 1-256-486-3493 or send us a quick note from our contact us page and we'll be happy to answer any questions you have.

Latest posts

  • Weekly Knife Giveaway - Claim your Entry

    We're giving away a knife every week through the end of April. Enter today and then bookmark this page to make it easy to claim your additional entries every week.  Read more →

  • Survival with Bandanas

    When I am out in the wild for more than a day I always think about survival. I only want to carry a certain amount of weight. When you are walking around in the wilderness weight is important. You only... Read more →