ESLife

Posts in the how-to category

How to use a Firestarter

I have spent considerable time out in the woods. There is nothing like a good week or so backPacking trip to get you back in the right frame of mind. Being away from civilization gives one a greater perspective of the world around us as a whole.

Being able to build a fire is a survival tool that anyone who spends anytime out in the wilderness should know. I will bring a lighter but lighters fail and if that happens you are SOL unless you know how to use a fire starter.

To start a fire in the woods you will need two things: tinder and the fire starter.
Posted by ES Team on 06 March, 2015 camping, how-to, survival | 0 comments | Read more →

Guide to Doomsday preperations and essential supplies

Hope you enjoyed the guide to preparing for Doomsday. Now go check out our Extremely-Sharp Survival Gear and stock up!

Posted by ES Team on 22 January, 2015 how-to, survival | 0 comments | Read more →

Hike the Appalacian Trail

Your guide to Hike the Appalacian Trail

35 Reasons to Hike the Appalachian Trail

Now that you've reviewed the top thirty five reasons to hike you need to check out the Extremely Sharp Camping section  to get your gear! 

A wonderful infographic about 35 reasons to hike the appelation trail by the geniouses at 97thfloor.

Discover why so many hikers visit the Appalacian Trail every year and secrets along the trail. It takes 5 months to complete and only 13% who attempt it finish. It spans from the state of Maine to Georgia. The trail is marked by about 160,000 white trail markers. 

Posted by ES Team on 21 January, 2015 get outdoors, hobbies, how-to | 0 comments | Read more →

Remove fish hooks stuck in the skin

Fisherman get hooks imbeded in their skin. Real men use these methods to deal with it:

How Real Men Remove Fish Hooks Stuck in the Skin

Now that you know how real men handle it, head over to www.extremely-sharp.com and get the fishing knife you'll use to cut it out, and the fillet knivesyou'll need once you're finished for the day.  

Posted by ES Team on 18 January, 2015 fishing, how-to | 0 comments | Read more →

Survival guide to allergy season

Survival guide to allergy season and seasonal allergies

Now that you understand your allergies, you can get outside and go camping. First stop by www.extremely-sharp.com and get your camping and survival gear. You'll love our family owned website. Get all the knives you need for camping, fishing and hunting at ESknives.com 

Seasonal Allergies

A fantastic infographic about Seasonal allergy facts. Such as:  4 million workdays lost per year due to hay fever, 20 million in the U.S. suffer from allergies to dust mites, 10 million suffer from allergies to cat dander, 35 million suffer from pollen allergies, 1 in 5 people in the U.S. have allergies, 14.5 billion is spent on average per year due to allergies. What causes allergies? (Allergens, antibodies, mast cell, histamine)  

Posted by ES Team on 17 January, 2015 how-to, survival | 0 comments | Read more →

Crossbow Aiming and Hunting Techniques

Crossbow Aiming and Hunting Techniques

Crossbow Aiming and Hunting Techniques

  • Always cock your crossbow consistently in the same place. Failure to do so can lead to off setting of your site. Marking your string while it is at rest with two marks on either side of the stock should remedy this problem.
  • The accuarcy of the arrow is two dimensional. The proper combination of arrow and broadhead is needed.
    • The smaller the broadhead the better the accuracy, in general.
    • The task for the arrow is to correct any play the broadhead might introduce to the flight. It accomplishes this by spinning. A slight offset with straight clamps works very well.
  • Trajectory is the key to any good shot. Remember most shots are under 20 yards. There's no point in shooting past that because the variation in the shot will vary too much for any regular sized target or game.
    • Assuming you set your site at 20 yards then your trajectory will be one or two inches high at fifteen yards, and two or three inches low at twenty-five yards.

*Note: Care should be taken when shooting from a tree stand since the crossbow stock will kick in a upward direction. Make sure the area around your crossbow is clear of any limbs or other objects before firing.

History of the Crossbow
Literary and physical evidence suggest that the crossbow originated in China during the 4th century BC, though a type of crossbow called the gastraphetes may have been independently invented in Greece at about the same period. It wasn't until the 10th or 11th centuries AD that the crossbow became a significant military weapon in Europe. It passed from general military service in the 16th century, but its use for hunting and target shooting has continued to the present day. The most of following chronology is abridged from GUIDE TO THE CROSSBOW by Paterson:

341 BC Earliest reliable record of crossbow use at battle of Ma-Ling in China.
228 BC Earliest crossbow artifact, a bronze lock mechanism from the tomb of Yu Wang.
0-100 AD Heron of Alexandria describes gastraphetes.
300-700 Roman carvings of crossbows.
385 Vegetius mentions crossbows in DE RE MILITARIA.
1066 Crossbows introduced to England by Normans.
1096 Anna Comnena describes Norman crossbows.
1100-1200 Composite crossbow lath appears.
1139 2nd Lateran Council interdict forbids use of crossbow among Christians.
1192 Crusader victory at Jaffa aided by crossbows.
1314 Earliest reliable record of steel lath.
1346 Genoese crossbowmen defeated at Crecy by English longbowmen.
1373 Earliest illustration of cranequin.
1503 First of many English laws restricting possession and use of crossbows.
1550-1600 Firearms replace crossbows in most Weatern armies.
1860 Photographic evidence from Chinese shows repeating crossbows still used there as military weapons.
1939-45 "Arrowspeed" crossbow used by Austrailian commandos in Pacific Theatre.
1945-1975 Crossbows employed by Montagnard peoples and US special forces during Vietnam conflict.
1960?-present Crossbows used to shoot anesthetic darts for capturing and treating wildlife; also used to obtain tissue samples from marine animals for obtaining genetic information.

Crossbow Terms

ARBALIST Latin language term for crossbow, derived from arcuballista (also spelled ARBALEST).
ARMBRUST German language term for crossbow which is often preferred in international circles.
ARROW Synonym for bolt which is preferred by some modern crossbow manufacturers.
BACK Side of bow or lath facing target.
BALLISTA Roman seige engine similar to oversized crossbow.
BARREL Section of the stock between the latch and lath; sometimes used as synonym for track.
BARRELED CROSSBOW Crossbow having a tubular barrel rather than a track; used to shoot balls, usually of lead; synonym for slurbow.
BASTARD STRING String to brace a crossbow for installation of bowstring; synonym for bracing string.
BELLY Side of bow or lath facing shooter.
BELT HOOK Metal hook(s) attached to belt to aid cocking.
BENDING LEVER Hindged lever to aid cocking; pushes string back using lugs or a ring mounted at front of crossbow; provides mechanical advantage of about 5:1, varying with lever length.
BINDING See BRIDLE.
BOLT Short projectile for crossbow resembling arrow.
BOLT CHANNEL See TRACK.
BOW See LATH.
BOW IRONS Metal fittings used to secure lath to stock; usually tightened with metal wedges.
BOWSTEEL Steel lath.
BOWSTRING String used on all archery weapons to transfer force from bow to projectile.
BRACED Position of bowstring when mounted on bow or lath, but not cocked.
BRACED HEIGHT Distance between braced bowstring and belly side of riser, measured from the bowstring's center.
BRACING STRING See BASTARD STRING.
BRIDLE Binding, usually of twisted sinew cord, used to tie lath to stock on medieval crossbows.
BULLET CROSSBOW Crossbow designed to shoot bullets; generally used in reference to double-string types.
BUTT Rearmost portion of crossbow stock; also refers to earthen mound used in long range target shooting, and as a general term for backstop.
CATCH See LATCH and SAFETY.
CENTER-SHOT Bow or crossbow lath designed so that the arrow/bolt passes through its center; center-shot crossbows often have two separate limbs.
CLEAN DRAW See POWER STROKE.
CLIP Spring used to retain bolt to cocked crossbow prior to shooting; usually made of horn or metal.
CLOUT Long range archery shooting. Modern practice uses a horizontal target 15 meters in diameter outlined with flags; scoring is determined by measuring distance from center.
COCK To draw bowstring from braced position to latched position.
COCKING LUGS Metal protruberances on crossbow for anchoring bending lever, cranequin or goat's foot.
COCKING PEG Peg required to set some crossbow trigger mechanisms prior to cocking.
COCKING RING Metal ring bound to the front of the lath to anchor bending lever.
COCKSCOMBING Method of serving sometimes used on loops of crossbow bowstrings.
COMPOSITE Combination of materials used to construct lath including horn, wood, sinew and baleen.
COMPOUND Modern lath construction using cables and eccentric pulleys.
CORD AND PULLEY Cocking aid consisting of cord with ends attached to crossbow butt and user's belt running through a pulley attached to bowstring; provides mechanical advantage of 2:1.
CRANEQUIN Cocking device using rack and pinion; can provide mechanical advantage of about 145:1, varying with size and number of teeth.
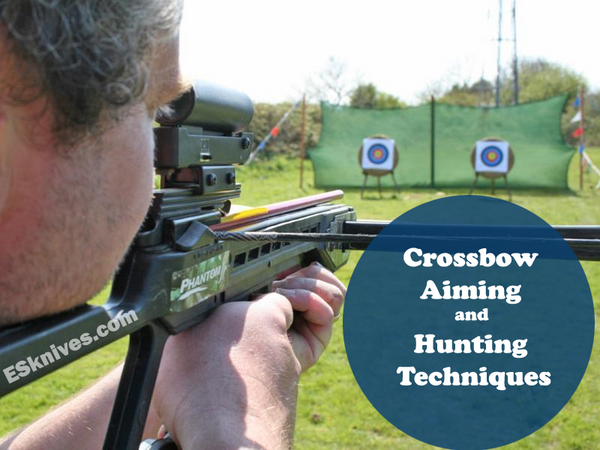
CROSSBOW Archery weapon consisting of a lath mounted to a rigid stock, having a mechanical means to hold and release the drawn bowstring. See also ARBALEST, ARMBRUST, BARRELED CROSSBOW, BULLET CROSSBOW.
DOG'S FOOT See GOAT'S FOOT
DOUBLE STRING Complex form of bowstring designed to launch round projectiles from crossbow; has leather pouch at center to hold ball.
DRY-FIRE To release cocked bowstring without projectile; term borrowed from firearms.
Posted by ES Team on 15 January, 2015 hobbies, how-to, hunting | 0 comments | Read more →

Knife Sharpening Techniques

Need to sharpen a knife? We'll help you out with some tips. Knives are an intimate part of our family and our lifestyle, so we're always happy to help out.

Sharpening a knife is sometimes perceived as the most difficult knife care task; and it probably is, but only until you learn a few tips that we'll share below.

General Knife Sharpening Instructions

Modern stainless steel is very hard and, when sharpened properly, will hold a good edge for a very long time. When sharpening a knife you must have a high quality sharpener that features a rough stock removal surface (preferably diamond abrasive) and a finishing surface of hard stone or ceramic abrasive. The diamond and ceramic materials will cut away the steel on the blade's cutting surface easily as these materials are much harder than steel. This makes it easier on you too. A hard stone will also perform this task, but the stone is only slightly harder than the steel and so this requires more effort on your part, although we find the extra time somewhat relaxing at times. 

Pro tip: The specific angle is not as important as keeping a constant angle.

  • Picking your angle: When using the rough grit stone use a shallower angle than when using the fine stone. That is, grind the (usually) sorry factory edge to a shallow angle with the rough grit stone and I want to stress here that there is no special way to do this because you are just removing useless stock from the blade. Just grind one side of the blade until it is ground down enough.
  • What is enough? Well enough is defined like this: Once you have ground the blade down enough (maintaining the same angle all the while) to have touched the cutting edge, start to test the edge on the opposite side of the blade by running your finger nail at a 90 degree angle to the opposite edge moving from the back of the blade towards the edge. Why? Well you are trying to find the curled edge (or burr) created by the grinding down of the first edge. Once you have this curled lip along the edge from tip to tang then turn the knife over and begin grinding the other side until you have the same curled lip for that side. Once you are done you should have a roughly ground edge with a fairly shallow angle.
  • The final touches: Now take your fine grit stone (at least 400 grit or finer) and raise the angle of the blade you just ground down by just a little more and using moderate pressure make a single cutting stroke maintaining as much as possible the same angle down the stone making sure to sharpen the whole length of the edge on the stroke. Now after one single stroke turn the knife over and repeat the same process. Do all this slowly and deliberately. Repeat this about 6 times and then begin to lighten the pressure on the blade as it strokes the stone. At about the 10th or 12th repetition about only the weight of the blade should be pressing on the stone.
  • Testing the sharpness: After step 3 test the sharpness (carefully) by cutting a sheet of paper or (even more carefully) trying to shave a few hairs off your arm. If you followed step 2 faithfully you should have an almost razor sharp edge. If not then re-read step 2 and do it again from the course stone. Step 2 is most important. Step 3 actually does the sharpening.
  • The more highly polished an edge the better it cuts. "Teeth" does not a razor edge make.
  • IMPORTANT! Do not use water or oil of any kind on any stone to sharpen your knife. In fact if you have been using some liquid on your stone, wipe it off as best you can or get a new stone which has not been tainted with such a substance. I know this goes against years and years of trusted advise from friends, fathers, aunts, uncles, grandfathers and etc.... Trust me on this one.
Need a new sharpening stone, diamond sharpening rod or even a "system" that will always give you an incredible edge? Check out our selection of knife sharpening accessories. We use every one of these in our stores, in the Extremely-Sharp factory and in our personal lives. Of course, if you have any questions, just send us a quick message and we'll get back to you.

    Posted by ES Team on 12 January, 2015 get outdoors, how-to | 0 comments | Read more →

    Axe Throwing Techniques and Tips

    Axe throwing techniques and tips
    Axe Throwing Techniques & Tips
     
    Essentially an axe is easier to throw than a knife because the heavy blade does most all the work. It takes litttle effort to send an axe hurling through the air with reasonable accuracy.
     
    Size: A good sized throwing hatchet should be about 12 to 14 inches in length (32-37 cm). To throw the axe hold it firmly in your hand with a fist grip.
     
    Stance: Your stance is important as it will add balance and consistency to your throw. Make it wide enough to be stable and point the leg that coinsides with your throwing arm twords the target.
     
    Throw: The momentum of the head of the axe will carry it through the air. Remember that when you throw it. Because of this the only motion in your throwing arm should be in your elbow. You should release the axe when your arm is staight and aimed at the target. You should spend alot of time aiming at short distances and move your way back gradually over time. Remember this and don't get frustrated when it seems hard at first. Just like anything this takes practice. 
     
    Find new throwing knives, axes and stars.
    Posted by ES Team on 10 January, 2015 how-to | 0 comments | Read more →

    How To Oil an Italian Switchblade

    How to oil an Italian Switchblade

    How To Oil an Italian Switchblade Today I want to talk about Italian Stiletto Automatics. A common problem with Italian Stilettos is that after a period of time they stop working. You push the button and nothing….. No blade slings out. It just stays there. If you press on the blade the blade engages and slings out. Or Maybe it's just starts firing slow. It's obvious the spring still works. At first you may think your knife is toast, ready to retire. But the problem is easy to solve. Your knife needs oiling. An automatic knife needs to be oiled to keep them mechanism working. Oiling your knife is not complicated but it is essential to your knifes maintenance. Open your knife. Look at the blade. Close to the base of the blade you will see a small beveled hole in the blade. This is the oil hole. Get yourself some knife oil. Machine oil like 3 in one works. I use a Remington knife oil or a any 3 in one type oil will work. Take your oil and put a couple drops in the oil hole. Your are now half way there.

    Where the knife blade breaks you want to put a couple drops in there.

    How to oil an Italian stiletto switchblade

    Now work your blade by just moving it up and down. After 10 or 15 strokes close your knife. Push the button and the blade should shoot out fast. Do this 5 to 10 times. Your knife is now ready to go. Learning basic knife maintenance is a must for the avid knife enthusiast. A well oiled knife will give you years and years of service


    Posted by ES Team on 03 January, 2015 how-to | 4 comments | Read more →

    How to Fillet a Fish

    Knowing what to do after you catch a fish is an important part of angling. To be a true angler you have to be able to prepare your catch. Learning to Filet your fish is a must for most anglers.

    Easy Steps to Fillet a Fish

    I catch mostly fresh water fish. The fish I filet most are crappie. I may fillet a Bass from time to time but I usually release the Bass I catch. I do love large blue gill, shell crackers and crappie. My favorite fish to eat is a walleye. We don't have walleye here in Alabama but we do have sauger which is related to the walleye. We catch sauger here in in winter and the stay deep. They are great eating.

    There is an urban myth that you loose a lot of the meat by filleting. This is not true. You will lose a little but not much and having no bones in your fish makes up for the small loss.

    Keep your fish fresh. If you don't have a live well or a fish basket you can keep your fish on ice. This will keep them fresh till you are ready to clean them. You can filet a fish right out of the live well but my experience has been that they filet better after they have been iced down. The knife seems to flow through the meat easier on an iced down fish.

    I Always use a filet knife. Filet knives are thin sleek blades made to cut through fish. Any other knife will be to thick and cumbersome. You will end up butchering the meat. I like a Kershaw filet knife. They are great knives and reasonable priced. You can find a nice Kershaw for around $15.00

    Kershaw Filet Knife

    There are anglers out there that use an electric knife. I guess I am a little old fashioned but my experience has been that a filet knife gives a much better filet than the electric knife.

    Fillet Knife easy fish fillet
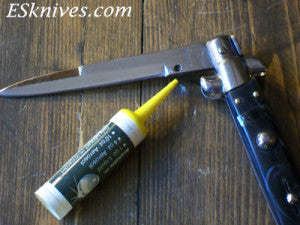
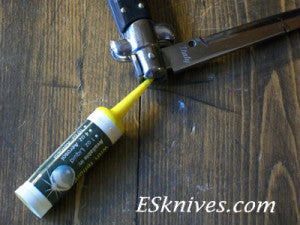
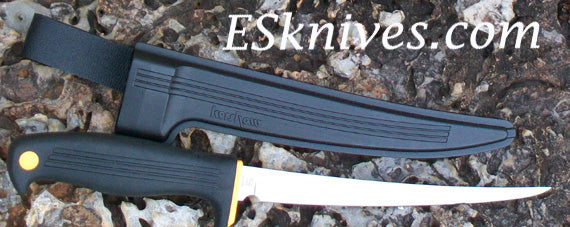
Keep your knife sharp. A dull blade is useless when filleting. If your blade is stainless make sure you run it on a steel or ceramic before you use it. People like stainless blades because stainless is rust resistant. The downside to stainless is that stainless does not keep an edge like a carbon blade. So with a stainless blade run it down your steel orceramic before each fish. That will keep it sharp and able to do the job.

    It takes a certain amount of touch to fillet a fish but with a little practice you will be filleting as a pro. After all we are not talking about brain surgery here.

    To skin or not to skin, I like the skin on most freshwater game fish. Catfish I skin with needle nose pliers. If you decide to keep the skin you will need to scale your fish before filleting. I have found that a metal spoon makes one of the best fish scalers you'll find. You can spend lots of money on fish scalers but none of them store bought scalers will outperform the common kitchen spoon. If you decide to skin your fish I have found that running your blade between the meat and the skin after you have your filet is the easiest and fastest way to remove the skin.

    Here are a few pointers when filleting. To really get a good idea on technique take yourself to you tube and watch a few videos on filleting a fish. After you read our suggestions. The suggestions will make a lot more sense after viewing a few videos.

    1. Make a deep cut just behind the gills (about halfway through the thickness of the fish).
    2. Cut a slit a few inches in length along the top of the fish (the dorsal side). (There is a slightly different technique for y-bone fish like northern pike or muskees.)
    3. Using the tip of the knife, separate the flesh from the bones. The fish should open up just like a book.
    4. When completely open, finish cutting away the fillet by moving the knife along the spine of the book.

    After you are done with your fish you can be good to earth by recycling. The leftover fish parts make great chum, great catfish bait and great fertilizer.


    =======================================

    Posted by ES Team on 30 December, 2014 fishing, hobbies, how-to | 0 comments | Read more →
    1 2 3 4 Next »

    Stay in touch

    Contact Us

    We'd love to hear from you. Call us at 1-256-486-3493 or send us a quick note from our contact us page and we'll be happy to answer any questions you have.

    Latest posts

    • Weekly Knife Giveaway - Claim your Entry

      We're giving away a knife every week through the end of April. Enter today and then bookmark this page to make it easy to claim your additional entries every week.  Read more →

    • Survival with Bandanas

      When I am out in the wild for more than a day I always think about survival. I only want to carry a certain amount of weight. When you are walking around in the wilderness weight is important. You only... Read more →